May-August are common times for people to relocate, making it a busy season for landlords and property managers. As peak rental season gets into full swing, a little extra preparation can have a big impact on your ROI, stress levels, and customer service to potential tenants. Maximize peak rental season by understanding the tenant lifecycle, updating your website and listings, capitalizing on renewals, and having a vendor list or DIY maintenance kit on-hand.
Peak rental season can be overwhelming in the rental industry, especially if you don’t prep well behind the scenes.
With National Moving Month in May and the school soon out for summer, the months between May and August can be a fast-moving time for property managers and landlords. Summer is the most popular time of year for relocating, meaning that peak rental season is just around the corner.
Peak rental season doesn’t have to lead to chaos and stress. Landlords and property managers can take advantage of this hot market while staying organized and stress-free with a few helpful tips.
When is Peak Rental Season?
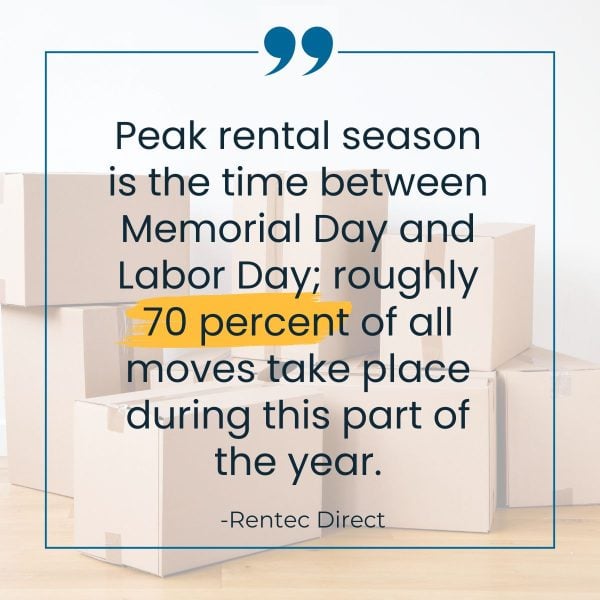
Peak rental season is the time between Memorial Day and Labor Day; roughly 70 percent of all moves take place during this part of the year. This statistic encompasses the real estate industry as a whole, but renters are no exception to the rule.

Winter and fall can come with more risk of unpredictable weather, and parents are loathe to disrupt their children’s school year with a move. Moving in late spring and throughout the summer can eliminate these obstacles.
Spring weather may invite the risk of showers but is less likely to storm like a fall or winter day. Renters moving in spring can avoid the blistering heat of summer as many areas of the country experience mild temperatures. Summer’s longer daylight hours can make it easier for renters to pack and load moving trucks–giving families more flexibility to DIY their move.
5 Tips to Maximize Peak Rental Season
Ensure You Understand the Tenant Lifecycle
If you are a new landlord or property manager, ensuring you know exactly what the lifecycle of tenancy looks like is key to timing your actions while managing a rental. Be sure that you know the best order of operations when it comes to tenancy, this will ensure you don’t miss a vital step, and your units can be rented easily and seamlessly when turnover occurs.
The lifecycle of tenancy is as follows:
- Rental Vacancy: This includes all the steps to get the unit rent-ready, including cleaning, photography and marketing. This can also include rental showings and engagement with prospective tenants.
- Leasing Tasks: The lease creation process is arguably the most important aspect of lease; ensure you regularly take the time to check in with a licensed attorney in your area who specializes in landlord-tenant law. Laws change regularly, so you always want to ensure your lease agreement is up-to-date and legal.
- Prep for Move-in Day: Remember this can be a stressful time for your tenants, so be sure to offer simple ways to make them feel at home. A tenant welcome basket, a few toiletries, and a cheat sheet of the most common rental rules can also be a helpful addition.
- Occupancy Tasks: These have their own lifecycle and are at the heart of rental management. Routine tasks like rent collection, inspections, seasonal maintenance, repairs, and addressing lease violations are all part of this task list.
- Extending or Ending Tenancy: Once the lease term has ended, you and your tenants have the opportunity to extend the term through a term renewal or a month-to-month agreement. Alternatively, both parties can choose to end tenancy and part ways.
- Move-Out Process: The move-out process marks the time for a move-out inspection and for the cycle to repeat with the hopes of finding a new tenant.
Learn more about how to make these steps as smooth as possible: Order of Operations for Leasing | Understanding the Lifecycle of a Tenancy
Update Your Listings and Website Beforehand
Your online precedence is a key part of your marketing strategy. A website is a powerful tool that allows potential clients to learn more about your services, view your properties, and contact you. Your property management website should be continuously updated with accurate information, and you need to make sure it’s designed to attract and retain tenants. With this in mind, your website should also be mobile-friendly since the newest generation of renters often utilizes their phones and tablets to search online.
Your website should feature:
- Your available properties
- Your management services (for owners seeking a property management company)
- An up-to-date “about us” page
- Testimonials
- Contact information
Learn more: What to Include on a Property Manager Website
You may not be able to get high-quality photos of your property until turnover has occurred, but you can ensure that each property in your portfolio has an up-to-date rental listing on file for when turnover occurs.
A good rental listing should have these key elements:
- Location details
- Bed and bath numbers
- Square footage and floor plan
- Rent amount (including deposits and fees)
- Descriptive words to highlight property aesthetics/style
- In-unit amenities
- Residential amenities (for multifamily units)
- Storage and parking options
- Security features
- Your pet policy
- Photographs
- Contact information
Learn more: How to Write a Great Rental Listing
Capitalize on Renewals
Renewals are the most reliable way to to make your peak rental season a little less stressful. Instead of facing the stress of tenant move-out inspections, returning security deposits, making the property rent-ready and finding new tenants, you can save a lot of time and money by keeping the good tenants you already have. Peak rental season is often peak renewal season, so be sure you are prepared to encourage your tenants to stay long-term or renew their lease for the upcoming year.
Here are a few helpful tips for capitalizing on renewals:
- Offer renewal incentives and rent concessions (just like you would for new tenants)
- Allow renewing tenants to customize their space by allowing them to paint
- Address any tenant complaints
- Update the rental throughout the year
Remember that your tenants may be looking at competitors and could be enticed by incentives or discounts available to new tenants. If you truly want to keep your excellent tenants for another year, consider offering similar incentives to encourage them to stay.
Throughout the year, be sure that you are building a great landlord-tenant relationship. Address tenant concerns efficiently. Don’t hesitate to update your properties throughout tenancy, add amenities and ensure outdoor maintenance is completed. This can boost interest for new tenants if your current do not stay. However, it can also encourage tenant retention, which can keep your overhead costs and time investment far lower.
Create a Landlord Turnover Kit
Turnover is stressful for landlords and tenants alike. This process becomes exponentially more stressful as you manage more units during peak rental season. Make it a priority to be as prepared as possible so all the turnover steps can be completed successfully and efficiently. Whether you are a DIY landlord or a large management company, you’ll want to ensure you have a step-by-step guide for how to handle tenant turnover. If you or your team usually does all the work of cleaning and updating the property alone (instead of hiring a vendor) make sure you include all the necessary cleaning and maintenance tools in your landlord turnover kit.
Learn more: How to Make a Landlord Turnover Tool Kit
Have a Vendor List On-Hand
If you generally outsource tasks, be sure you have already done the vital work of vetting vendors and having an approved vendor list. If you are a small rental business and generally do most jobs yourself, you should still use this time to ensure you have a few pre-screened vendors for any emergencies or big jobs that need to be done quickly and professionally during the busy rental season.
You should have a list of vendors for which you are happy with their current vendor pricing, availability, workmanship, and attitude. Having two or three on your list per subcategory can be a lifesaver when your first choice isn’t available. Don’t overlook the benefit of subcategories and/or keeping detailed notes. Be sure to screen your new vendors and consider offering them a smaller task to evaluate their work before offering a potentially big job.
Learn more: A 5-Step Approach to a Successful Vendor List: Infographic


