Selecting the right floor for rental property is a balance between durability, affordability, and aesthetics.
A good looking floor can create a desirable property feature, cutting down on vacancy time and increasing the potential rental rate. Additionally, an expensive floor can add to the property value of your the investment.
However, since you are not going to be living at the property, picking the most beautiful hardwood floor is not always the wisest choice for an investor. Renters are known to cause increased wear and tear on a property compared to a homeowner, so investors are advised to find durable solutions for their properties.
When it comes to flooring for a rental property, owners often consider carpet, wood flooring or vinyl.
Today’s vinyl flooring products are attractive, affordable, durable and stain-resistant. They can be installed in practically any room—even kitchens and baths.
Now, you’re probably familiar with vinyl sheet flooring and vinyl floor tiles, but there’s a new generation of resilient-vinyl flooring that’s rapidly growing in popularity. Called vinyl-plank flooring, it comes in thin, flexible strips—or “planks”—that resemble traditional hardwood floors.
Vinyl planks feature realistic wood-grain patterns and textures and come in styles that represent nearly every wood species: oak, cherry, teak, pine, walnut, hickory and maple, to name a few. There are dozens of colors from which to choose, including those that look like oil-based stains, natural wood tones and whitewashed or weathered finishes.
However, the best reason to consider vinyl-plank flooring is that it’s extremely easy to install, even for novice DIYers. The planks go down quickly, cut easily and don’t require any messy adhesives or special fasteners. Before discussing the installation procedure, let’s take a look at the two newest types of vinyl-plank flooring: interlocking and grip-strip.
Easy Installation: Two Options
Both interlocking planks and grip-strip planks can be installed as a floating floor, meaning that they’re not fastened or glued down to the subfloor in any manner. The main difference between the two products is that interlocking planks have tongue-and-groove joints that snap together, while grip-strip planks come with a factory-applied adhesive that sticks the planks to each other.
Each type of plank can be installed directly over plywood or OSB subfloors, concrete slabs and most existing floors, including wood, vinyl and ceramic tiles. However, approved installation methods vary from one manufacturer to the next, so be sure to read the installation instructions before proceeding.
Also, note that grip-strip floors are water resistant, while some interlocking planks are waterproof. The final consideration, of course, is the price: Interlocking vinyl planks typically cost $2 to $3 per square foot. Grip-strip planks cost slightly less, averaging between $1.75 and $2 per square foot.
Installation Basics
Regardless of whether you’re putting down interlocking or grip-strip planks, observe the following rules to ensure a successful, professional-quality installation:
- Measure the room’s width and divide by the plank width to determine the width of the planks in the last row. (You want to avoid ending up with a thin sliver of flooring along one wall.) If necessary, trim the planks in the first row to ensure that the last row is at least as wide as one-half the width of the planks. For example, if you’re laying 6-inch-wide planks, the last row should be at least three inches wide.
- Buy 10 percent more flooring than you need to accommodate for cut-off waste and any miscuts.
- Snap a chalk line onto the subfloor in front of the starting wall to ensure the first row is laid perfectly straight.
- Allow the flooring to acclimate to the room temperature by stacking the unopened packages in the room for at least 48 hours. The room temperature must be between 65° and 85° F.
- Carefully pry off the baseboard and shoe molding from around the room. Save the moldings for reinstallation later.
- There are subtle differences in the flooring’s pattern and color from one package to the next, so be sure to take planks from various packages during installation to ensure a balanced appearance.
- Don’t install any plank that’s shorter than recommended by the manufacturer, usually six inches long.
- Undercut each door jamb to allow the planks to slip beneath it.
- Maintain the recommended expansion gap—usually a quarter of an inch—between the vinyl planks and room walls.
- Stagger the end joints between rows of planks by at least six inches.
- Be sure that all cut ends of flooring face the walls. (Baseboard molding will conceal the cuts.)
Grip-Strip Installation
Here are the basic steps to installing grip-strip vinyl planks:
- Measure the room’s length along the starting wall to determine the length of the last plank in the first row. If it’s less than 6 inches, trim several inches off the first plank in the row, which effectively lengths the last plank.
- To cut a vinyl plank, use a layout square and sharp utility knife to score the finished surface. Then, bend the plank, and it’ll snap cleanly along scored line.
- Set the first plank into place on the chalk line with its cut end a quarter of an inch from the wall. Then, start installing full-length planks.
- As you butt the planks end-to-end, overlap the adhesive grip-strip and firmly press down each joint with a hand roller.
- Set the last plank in the first row, making sure its cut end faces the wall.
- To install the planks in the second row, butt them tightly against the previous row, making sure to overlap the long grip-strip on the edges of the first-row planks.
- If a seam isn’t tight, you can peel up and reposition the plank, but you must do so within 15 minutes. After that, the adhesive won’t release.
- Continue to work your way across the room, pressing the planks together and rolling down the grip-strip seams with a hand roller.
- When reaching the last row, trim the planks to fit, making sure to maintain the expansion gap.
- Finally, rent a 75- or 100-pound floor roller and roll down the entire floor. Make several passes across the width and length of the floor, pressing down each and every seam.
- Replace the baseboard and shoe molding, making sure to nail them to the wall, not the floor.

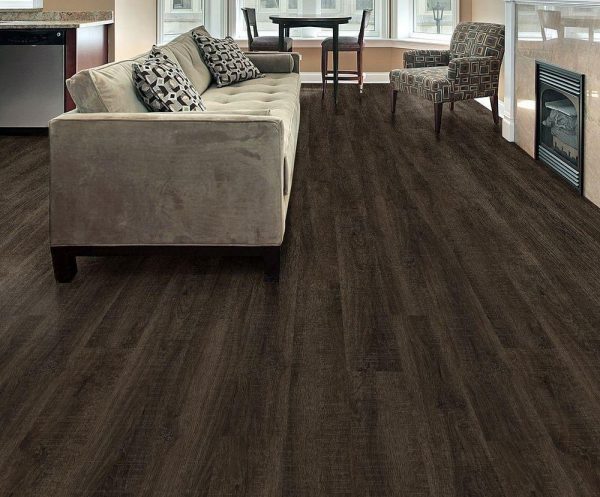
What appears to be a dark-stained oak floor is actually created by 6-inch-wide by 36-inch-long grip-strip vinyl planks.
Interlock Installation
Here are the key steps to putting down interlocking vinyl planks:
- Measure the room length to determine the length of the last plank in the first row. If it’s less than six inches, trim the first plank in the row.
- Use a utility knife to slice off the tongue edge from the first-row planks.
- Lay the first plank into place, properly spaced off the walls. Hold the second plank up at a slight angle and press its tongue end into the groove end of the first plank.
- Lower the plank to snap the end joint closed. Continue in this manner to join the remaining first-row planks end-to-end.
- If necessary, cut the last plank to length with a layout square and utility knife.
- To install the first plank in the second row, hold it up at an angle and press its long tongue edge into the groove edge of the planks in the first row. Then, push down to snap the planks together edge-to-edge.
- When installing all subsequent planks in the second row, you must align the end joints and edge joints at the same time, which is simple to do since the flooring isn’t fastened down to the subfloor.
- Continue installing rows of vinyl planks, snapping each tongue-and-groove joint together by hand.
- At the last row, trim the planks to fit while maintaining the recommended expansion gap.
- Reinstall the baseboard and shoe molding around the room, making sure to nail them to the wall, not the floor.

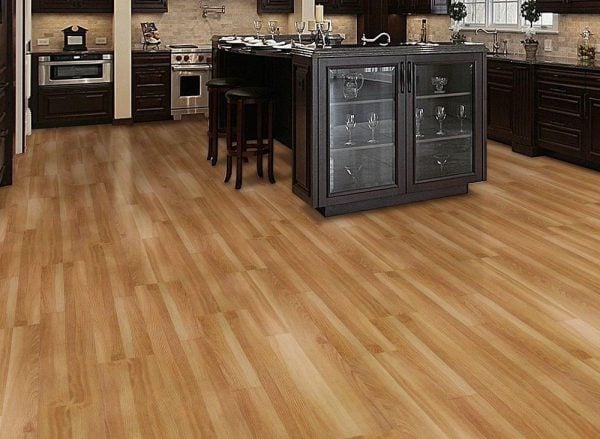
This beautiful interlocking vinyl-plank floor mimics the natural beauty of solid cherry hardwood.
Final Word
Here, I chose to highlight interlocking and grip-strip vinyl-plank flooring because they’re by far the easiest types to install. However, there are glue-down and peel-and-stick versions of vinyl planks, but they’re much messier and more difficult to work with, especially for DIYers.
Vinyl planks are ordinarily installed to resemble a traditional wood floor, but if you’re feeling creative, try combining vinyl planks with square vinyl tiles to create a custom floor of “stone” tiles bordered by “hardwood” strips. For more design ideas, visit your local home improvement center or contact vinyl flooring manufacturers for other integrated pattern suggestions.
About the Author:

Home do-it-yourself expert Joe Truini has taught many homeowners the finer points of DIY kitchen design and organization. Joe’s work has appeared in several national magazines, including This Old House, Popular Mechanics, Woman’s Day and Today’s Homeowner. Joe writes his tips for the Home Depot, where you can find a number of vinyl flooring options for your home.


just a reminder to first timers: when you install, you need to stagger your plank ends for maximum strength and stability. Think of a brick wall and how the seams between bricks in row one and the seems in row two straddle the row one seams.
Our table saw was priceless. once we got the layout we could cut almost all of the pieces for the big are of the floor to the required size, so one of us could continue laying the floor while the other calculated and measured for special cuts (ie , heat ducts etc..)
I installed a product that had the look of ceramic tile and it had a ceramic or stone coating on it. Even though installed as directed, but we had a problem with the planks where the cuts were. they just sucked up any amount of water and wanted to swell. We noticed this where the cut ends were under the cabinet. So when we were finished the install, l ran flexible caulk around the edges so water would not penetrate to the flooring edge but the floor was still able to expand and contract (as they do through humidity, heat, cold conditions during the year) could expand and contract without a problem, but . Again, as joe said, your trim will cover it.
+